|
Gardens Ablaze |
||
|
|
Needlework
Mailbox Christmas Ornament |
|
Site Map
Home |
As far as Christmas crafts go, this one can't be beat for affordability. For less than 20 dollars, you can make a mailbox for everyone in the family with materials to spare. Each mailbox takes 3-4 hours to make - not too bad for a tradition that your kids will remember into adulthood! These make unique personalized gifts too - without breaking the bank. What you will need:
-
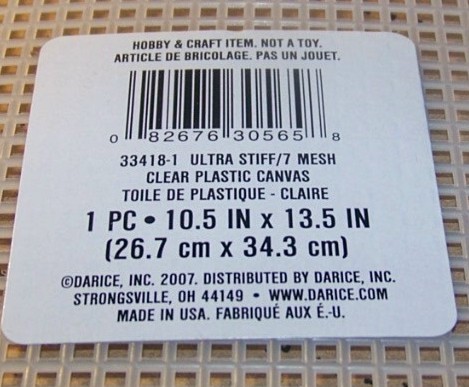
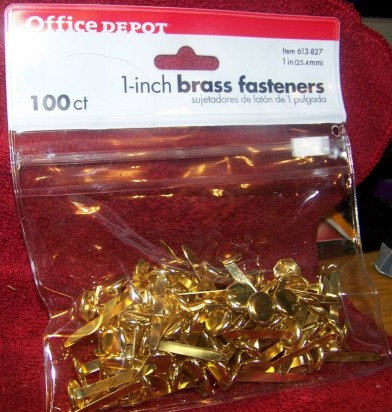
Plastic Canvas - under $5 a sheet at craft store (see below) Below are pictures of the label on the canvas I used for the above mailbox and of the brass fasteners. I made a lot of mistakes when I was trying to work out how to make this project, including buying the wrong type of canvas, so hopefully this will help you avoid the same mistakes. The canvas came in sheets a little bigger than a sheet of typing paper. Each sheet will do 3-4 mailboxes.
Basic Stitching Instructions:
So now we are ready to start stitching. You can cut the canvas as you need it or cut all the pieces first. Just count the number of squares and cut accordingly. Dimensions are below.
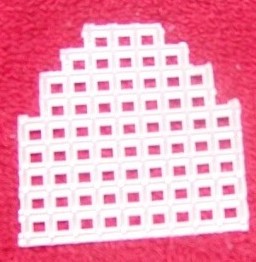
Top
- 25 x 18 squares
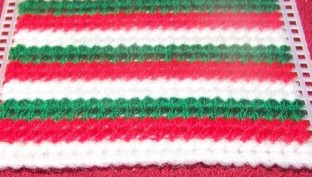
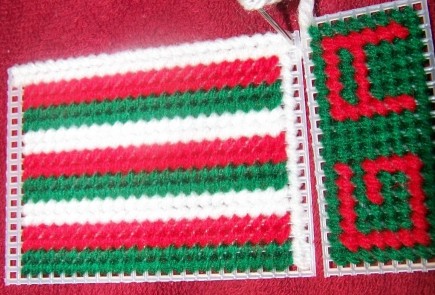
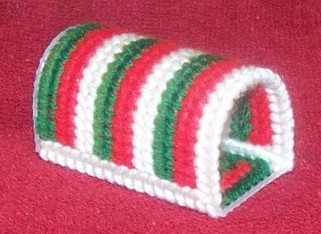
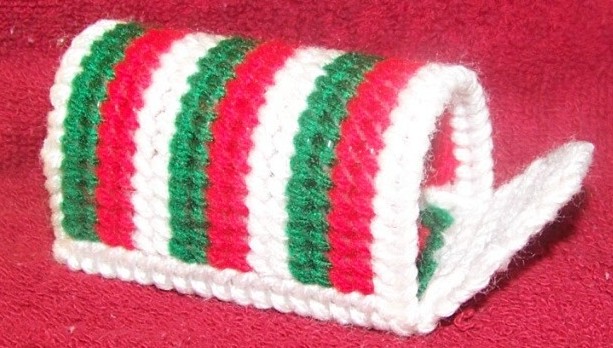
On the 25 x 18 piece, start at the first square and diagonally stitch until you are ready to change colors. If you want the stripes to run side-to-side as in the picture at the top of this page, stitch longways on the canvas. If you want them to stretch front to back, stitch the short side. I like to leave one square on the sides open so that there will be a border along the bottom, but you can stitch all the way for a smaller border if you prefer. Go all the way to the end of the canvas and then continue on to encompass even the edge on one side. This will be the front or your piece. A picture of a finished 25 x 18 piece is below. Note that I used two squares per color on my example, but you can go anywhere from 1 per color to a completely solid piece. Feel free to get creative - there are a lot of configurations as far as colors are concerned.
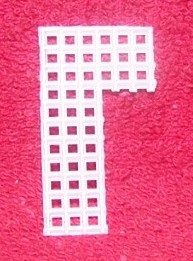
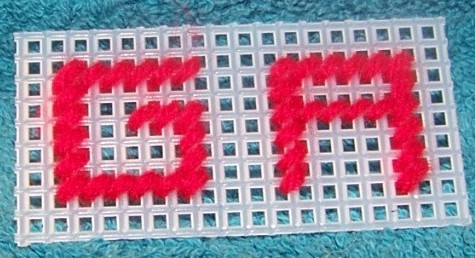
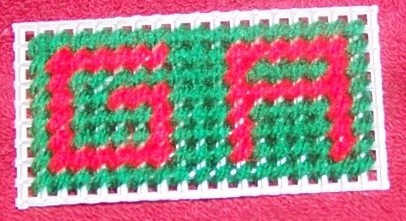
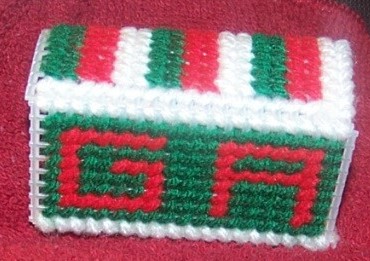
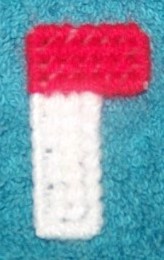
Now get your 9 x 18 piece and start stitching it. I like to put names on mine for each family member, but for this one that I made especially for this article, I used my website initials. Below are pictures of that. You just have to work with the room you have as far as lettering, and there is only room in my experience for no more than 4 letters, so you might have to get creative here for long names. Maybe initials in cases like that, or abbreviated names. Do your lettering first and then fill in the background.
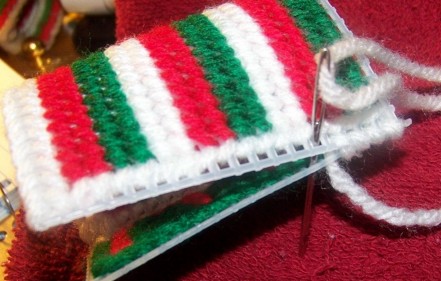
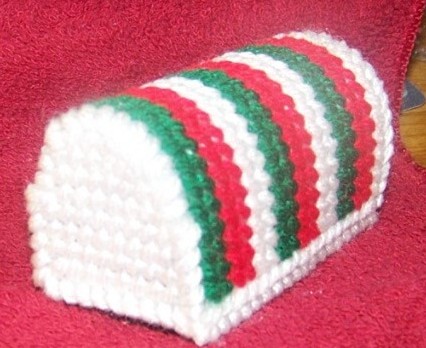
Now, stitch the bottom to the top piece. Since I like the extra border on the bottom, I have to stitch on the larger canvas one more row on the short side and then put the two pieces together as in the picture below.
Now stitch up the other side.
It's looking better!
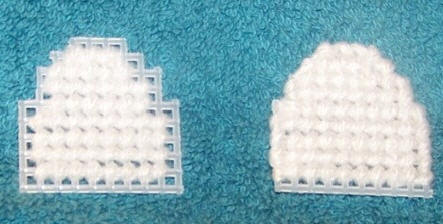
On to the front and back pieces you should have already cut. Fill them in using the same diagonal stitching as always. The back piece is on the left. Note that the edges are not finished. For the door, do finish the edges except for the bottom. To attach the back to the top piece, start on the bottom and stitch the straight edge first for stability, and then go up and around, as shown below. I find that using one color for both the edge and the body of the back piece is the best policy. To cover all the canvas edges, you might have to go through some holes twice, and using the same color makes the unavoidable odd stitch as unobtrusive as possible. Just take it slowly and if you make a mistake, pull it out and try again. See below for the finished back photo and for a photo of the front, which was stitched in at the bottom.
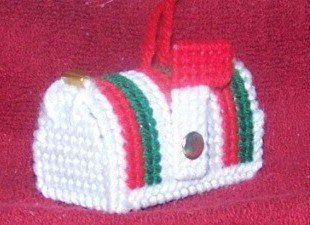
Almost done! Stitch the flag as below and finish the edges. Then take your brass fastener and poke it through as in the picture below. Position the flag where when it is in the down position, the red part end is even with the bottom of the piece. If you place the flag too far up, it will follow the contour of the top piece and not be perfectly vertical.
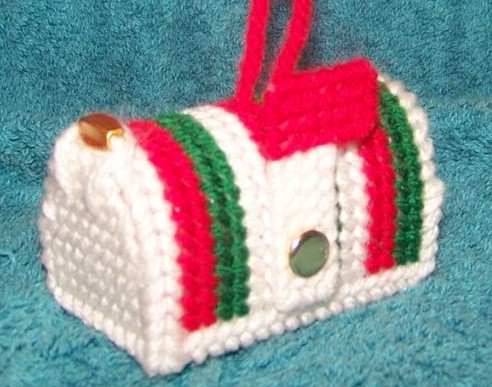
Last but not least, thread your needle and from inside the box, pull some yarn up through the top and then back down, so you can hang the ornament. Leave a loop of 5-6 inches, which should be plenty for hanging on the tree. Then attach your bead to the top of the piece, and put a loop in the door that goes over the bead to hold the door shut. Alternatively, you can put the bead on the door and the loop on the top. I have tried it both ways and have found that younger kids seem to have less trouble with it when the bead is at the top for some reason. And that's it! You have made a new family heirloom that will last for years and will provide a lot of enjoyment for you and your kids every Christmas!
Custom Search
|
|
|
Gardens Ablaze |
||
 Looking
for a new and different holiday tradition? This little mailbox may
just be the ticket and kids absolutely love it! Stash some candy or
a dollar bill in there and watch the kids rush to it every time the see
the flag up! Make one for every member of the family and don't be
surprised when the kids start leaving surprises in yours too!
Looking
for a new and different holiday tradition? This little mailbox may
just be the ticket and kids absolutely love it! Stash some candy or
a dollar bill in there and watch the kids rush to it every time the see
the flag up! Make one for every member of the family and don't be
surprised when the kids start leaving surprises in yours too!
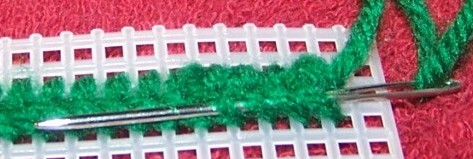
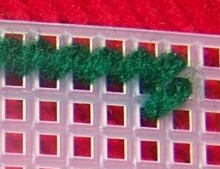 Plastic
canvas is stitched on the diagonal for better coverage of the canvas.
Never stitch straight up and down or a lot of canvas will show through the
finished project. A photo of diagonal stitching is to the left.
After making the first stitch in any color, you have to lock the end in
place by looping around and weaving it into the piece. A photo of
this is included below. Once you have woven it in 2-3 times just cut
off the excess. The last picture below is of locking the yarn
at the back of the canvas when you are out of yarn or ready to change colors.
Simply run
Plastic
canvas is stitched on the diagonal for better coverage of the canvas.
Never stitch straight up and down or a lot of canvas will show through the
finished project. A photo of diagonal stitching is to the left.
After making the first stitch in any color, you have to lock the end in
place by looping around and weaving it into the piece. A photo of
this is included below. Once you have woven it in 2-3 times just cut
off the excess. The last picture below is of locking the yarn
at the back of the canvas when you are out of yarn or ready to change colors.
Simply run
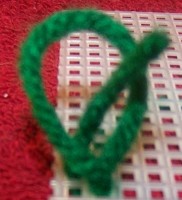 the
needle under the row and pull tight. As you work, you will get better
at figuring out how much yarn to use for each set of rows. A good
rule of thumb is about twice the yarn for the width of the project for each
row. Try not to run out of yarn in the middle of a row - it shows.
If you are running short, stop a row at the end and get more yarn and then
resume.
the
needle under the row and pull tight. As you work, you will get better
at figuring out how much yarn to use for each set of rows. A good
rule of thumb is about twice the yarn for the width of the project for each
row. Try not to run out of yarn in the middle of a row - it shows.
If you are running short, stop a row at the end and get more yarn and then
resume.